
Welcome to the Vehicle Blackbox DVR Manual. This guide provides essential information for installing, configuring, and operating your dash cam. Designed for evidence recording, it offers low-light capture and a wide viewing angle. Learn about G-sensor functionality, SOS emergency features, and video settings to enhance your driving safety and monitoring needs.
1.1 What is a Vehicle Blackbox DVR?
A Vehicle Blackbox DVR is a digital video recorder designed for in-vehicle use, capturing high-quality video and audio. It features G-sensor technology, loop recording, and emergency recording capabilities. This device provides evidence for incidents and enhances driving safety. With GPS functionality, it tracks location and speed, ensuring comprehensive monitoring and protection for drivers.
1.2 Purpose and Benefits of Using a Vehicle Blackbox DVR
The Vehicle Blackbox DVR is designed to provide hard evidence in incidents, offering low-light recording and a wide viewing angle. It enhances driving safety with features like G-sensor emergency recording and GPS tracking. Benefits include capturing crucial details, automatic emergency file protection, and peace of mind for drivers, ensuring comprehensive monitoring and legal protection.
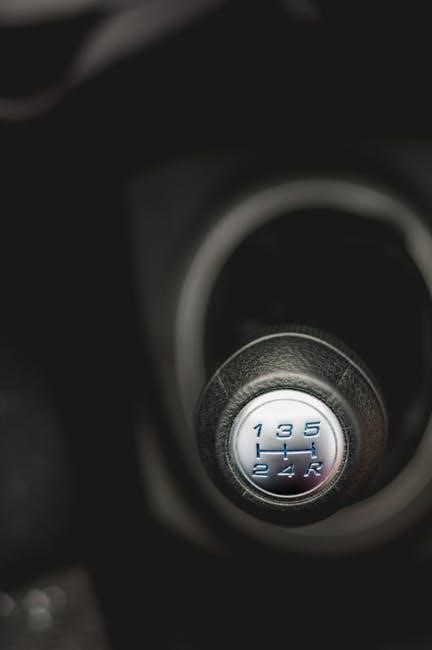
Installation and Setup
Installation is straightforward, typically involving mounting the DVR to your car’s rearview mirror using Velcro tape and powering it via a car charger or hardwiring.
2.1 Hardware Requirements for Installation
The Vehicle Blackbox DVR requires a compatible memory card, a power source (car charger or hardwiring), and a secure mounting solution. Ensure the device is bundled to your car’s rearview mirror using Velcro tape. Avoid water exposure, as it is not waterproof. Properly insert the memory card to prevent damage during boot or operation.
2.2 Step-by-Step Installation Guide
Mount the DVR to your car’s rearview mirror using Velcro tape for stability. Connect the power cable to your vehicle’s charger or hardwire it. Adjust the camera angle for optimal view, then secure it firmly. Insert the memory card, ensuring proper alignment to avoid damage. Power on the device and test recording functionality to confirm proper installation.
2.3 Best Practices for Mounting and Placement
For optimal performance, mount your Vehicle Blackbox DVR in a secure, visible spot on your windshield or rearview mirror. Ensure it doesn’t obstruct your view and is level for accurate recording. Adjust the camera angle to capture the entire road ahead. Secure the device firmly to prevent movement and ensure reliable footage capture.

Operating the Vehicle Blackbox DVR
Operating your Vehicle Blackbox DVR is straightforward. It allows seamless recording, playback, and settings adjustment. The device automatically starts recording when power is applied, ensuring continuous monitoring and evidence capture while driving.
3.1 Basic Operations: Recording, Playback, and Settings
Your Vehicle Blackbox DVR automatically starts recording when powered on, capturing continuous footage. Playback can be done on the built-in display or by transferring files to a computer. Settings allow you to adjust resolution, enable loop recording, and customize preferences for optimal performance and evidence capture.
3.2 Understanding the Menu System and Navigation
Navigate the menu system using buttons or touchscreen, accessing settings like resolution, G-sensor sensitivity, and emergency features. Customize preferences and review options via on-screen prompts, ensuring easy operation. The intuitive interface allows quick adjustments, enhancing user experience and functionality for seamless control of your Vehicle Blackbox DVR.

G-Sensor Functionality
The G-Sensor detects impacts, automatically saving video files to prevent deletion. Adjust sensitivity levels (high, medium, low, or off) to customize emergency file protection and collision detection.
4.1 What is a G-Sensor and How Does it Work?
A G-Sensor, or Gravity Sensor, detects vehicle acceleration changes, triggering automated video file protection during impacts. It measures motion via an accelerometer, saving critical footage upon sudden movements, ensuring important evidence is preserved without manual intervention, enhancing safety and reliability in recording significant events.
4.2 Adjusting G-Sensor Sensitivity Settings
Adjust the G-Sensor sensitivity to customize detection of impacts. Access the Settings menu, select G-Sensor, and choose from high, medium, or low sensitivity. High sensitivity captures minor bumps, while low reduces false triggers. Adjust based on driving conditions to ensure accurate emergency recording without unnecessary file protection, optimizing reliability and storage efficiency.
4.3 Emergency File Protection and Recovery
Emergency file protection ensures critical footage is saved during incidents. The G-Sensor automatically locks and protects files from deletion. Use the SOS button for manual file protection. Recover protected files via the device’s menu or by connecting to a computer, ensuring vital evidence is preserved and easily accessible for later review or legal purposes.
Emergency Features
Emergency features ensure critical moments are captured and protected. The SOS button manually locks footage, while automatic emergency recording triggers during incidents, preventing file deletion and preserving vital evidence for safety and legal purposes.
5.1 SOS Emergency Button: Usage and Benefits
The SOS emergency button is a vital feature for immediate incident documentation. Pressing it manually locks the current video file, protecting it from deletion. This ensures critical evidence is preserved for legal or insurance purposes. The button is easily accessible, offering peace of mind and added security during unexpected events or collisions.
5.2 Automatic Emergency Recording
The Vehicle Blackbox DVR features automatic emergency recording, triggered by the G-sensor during sudden collisions or sharp movements. This function instantly saves and protects the video file, preventing it from being overwritten. It ensures critical evidence is preserved, providing a reliable record of incidents for insurance or legal purposes.
Video and Recording Settings
This section explains how to configure video resolution, image quality, and recording settings to optimize your DVR’s performance for different driving conditions and preferences.
6.1 Adjusting Video Resolution and Quality
Adjusting video resolution and quality ensures optimal clarity and storage efficiency. Higher resolutions like 4K provide sharper details, while lower settings conserve memory. Access the menu to select resolution options (e.g., 4K, 1080p, 720p) and adjust quality settings for balanced performance. Lower quality may reduce file sizes but compromise detail, especially in low-light conditions.
6.2 Understanding Loop Recording and File Management
Loop recording allows continuous capture by overwriting older files when memory is full. This feature ensures uninterrupted recording and efficient storage use. Files are automatically named with date and time stamps, organized in folders for easy access. Adjust settings to customize loop duration and file management, optimizing storage capacity and retrieval of important footage.
6.3 Customizing Recording Formats and Intervals
Customize recording formats to suit your needs, choosing resolutions like 1080p or 4K. Adjust frame rates and intervals to optimize storage and quality. Set timed recordings or motion-triggered captures. Format options include MP4 for compatibility, while intervals can be set to record continuously or in segments, ensuring flexible and efficient video capture tailored to your preferences.

Memory Card Management
Properly manage your memory card by formatting it before use and ensuring compatibility. Regularly check storage capacity and delete unnecessary files to maintain optimal recording performance.
7.1 Installing and Formatting Memory Cards
To install the memory card, insert it into the designated slot until it clicks securely. Ensure the card is compatible with your DVR. Formatting the card via the device’s menu or a computer is recommended for optimal performance. Always back up important files before formatting, as it will erase all data. Use a high-quality memory card to prevent recording issues and ensure reliable storage of your footage. Regular formatting helps maintain the card’s efficiency and prevents corruption. Avoid removing the card during device operation to prevent damage. For best results, use a card with a capacity of 8GB to 128GB, depending on your DVR’s specifications.
7.2 Best Practices for Memory Card Maintenance
Use high-quality memory cards compatible with your DVR for reliable performance. Avoid exposing cards to extreme temperatures or physical damage. Regularly clean the card’s contacts with a soft cloth. Store cards in protective cases when not in use. Avoid frequent formatting; instead, use the DVR’s file management features. Check for firmware updates for your card reader or adapter to ensure compatibility and optimal functionality. Always handle cards by the edges to prevent static damage. Regularly back up important footage to prevent data loss. Replace cards showing signs of wear or corruption. Proper maintenance ensures consistent recording and playback performance, reducing the risk of data loss and system errors.
7.3 Understanding Memory Card Capacity and Usage
Memory card capacity determines how much footage your DVR can store. Higher capacities allow longer recording times. The DVR uses loop recording to overwrite old files when the card is full. Always use compatible cards to ensure stable performance. Avoid removing cards during recording to prevent data corruption. Check card health regularly to maintain optimal functionality and prevent unexpected issues during critical recordings. Proper management ensures your DVR operates efficiently and retains important footage securely.
Viewing and Managing Footage
Use the built-in display or transfer files to a computer for playback. Compatible software simplifies video management. Organize and review recordings efficiently to ensure evidence integrity and accessibility.
8.1 Using the Built-in Display for Playback
The built-in display allows you to review footage directly on the device. Navigate through menus to select and play recordings. The screen shows video, time, date, and GPS data if available. Use buttons to play, pause, or delete files. Ensure the device is powered on and the memory card is inserted for proper playback functionality. The display provides clear visibility for immediate evidence review.
For optimal viewing, adjust the screen brightness and angle. Use touch or button controls to scroll through clips. The built-in player supports formats like MP4, ensuring compatibility. This feature is ideal for quick access to recordings without transferring files to a computer, saving time and effort. Regularly check footage quality to ensure accurate evidence capture and storage.
8.2 Transferring and Viewing Footage on a Computer
To transfer footage, remove the memory card from the DVR and insert it into a card reader connected to your computer. Open the card’s folder to access video files, typically in MP4 format. Use a media player or dedicated software provided by the manufacturer for playback. Ensure compatibility with your computer’s operating system for smooth viewing.
For detailed analysis, transfer files to your computer and use compatible software to review recordings. This allows for enhanced playback features and file management. Always ensure the memory card is safely ejected after transfer to prevent data loss. This method is ideal for storing and organizing important evidence or clips for later use. Regular backups are recommended.
8.3 Compatible Software for Video Playback
Footage from your Vehicle Blackbox DVR can be played using compatible software like VLC Media Player or Windows Media Player. Dedicated software provided by the manufacturer offers advanced features such as GPS data synchronization and timestamp embedding. Ensure the software is updated for optimal performance and compatibility with your computer’s operating system.

GPS Functionality
The GPS functionality in your Vehicle Blackbox DVR enables precise location tracking, enhancing route retracing and evidence recording. It integrates with video to provide timestamped location data, ensuring accurate documentation of your journey.
9.1 How GPS Works with Your Vehicle Blackbox DVR
The GPS functionality integrates with your Vehicle Blackbox DVR by embedding location data into recorded videos. It uses satellite signals to track speed, direction, and coordinates, synchronizing this information with video footage. This feature allows precise route retracing and enhances evidence reliability by providing timestamped location details for every recording.
9.2 Benefits of GPS Tracking and Location Data
GPS tracking enhances your Vehicle Blackbox DVR by embedding precise location, speed, and time data into recordings. This feature aids in route reconstruction, providing valuable evidence for insurance claims or disputes. It also supports trip documentation and driver monitoring, ensuring accurate location-based insights for improved safety and accountability while driving.
9.3 Configuring GPS Settings for Optimal Performance
To configure GPS settings, enable the feature in the menu, ensure a strong satellite signal, and update maps regularly for accuracy. Adjust tracking intervals and enable location data embedding for precise recording. Check firmware updates and ensure proper device placement to maintain signal strength and synchronization with your Vehicle Blackbox DVR.
Troubleshooting Common Issues
Troubleshoot power issues by checking connections and restarting the device. Ensure firmware is updated and address G-sensor malfunctions promptly for optimal performance and reliability.
10.1 Resolving Power and Connectivity Problems
Check power cables and connections for damage or loose links. Restart the device and ensure proper installation. Verify power sources and update firmware if necessary. Consult the manual for troubleshooting guides or reset options to restore functionality and connectivity efficiently.
10.2 Fixing Video Quality and Playback Issues
Check video resolution settings and ensure compatibility with your playback device. Format the memory card if corrupted. Update the device firmware to resolve encoding issues. Use recommended media players or the supplied software for optimal playback. Ensure proper file transfer and avoid interrupted recording processes to maintain video clarity and integrity.
10.3 Addressing GPS and Sensor Malfunctions
If GPS signal is weak or lost, restart the device and ensure clear satellite visibility. For sensor issues, adjust G-sensor sensitivity or reset to factory settings. Update firmware to resolve software-related malfunctions. If problems persist, perform a factory reset or contact technical support for further assistance and troubleshooting guidance.
Maintenance and Care
Regularly clean the lens and device to ensure optimal performance. Avoid exposure to water and extreme temperatures. Update firmware periodically and store the DVR in a dry place when not in use.
11.1 Cleaning and Physical Maintenance
Regularly clean the lens with a soft cloth to ensure clear video capture. Avoid using harsh chemicals or abrasive materials that may damage the device. Handle the DVR gently to prevent physical damage, and store it in a dry, cool place when not in use. This maintains optimal performance and extends the device’s lifespan.
11.2 Updating Firmware and Software
Regular firmware and software updates are crucial for optimal performance. Download the latest version from the manufacturer’s website and transfer it to the TF card. Insert the card into the DVR and follow on-screen instructions. Avoid interrupting the update process to prevent device damage. Keep your DVR up-to-date for enhanced functionality and security.
11.3 Storing the Device Properly When Not in Use
Store the device in a cool, dry place, away from direct sunlight and moisture. Remove the memory card to prevent data loss. Use a protective case to avoid physical damage. Avoid extreme temperatures or humidity, which can degrade hardware. Proper storage ensures longevity and optimal performance when the device is next used.
Advanced Features and Customization
Explore advanced features like night vision for low-light clarity, motion detection for alerts, and customizable screen layouts. These enhancements provide tailored functionality to meet specific user needs effectively.

and Final Tips
12.1 Night Vision and Low-Light Recording
Night vision enhances visibility in low-light conditions, capturing clear footage even in dark environments. Advanced sensors optimize light sensitivity, ensuring detailed recordings at night or in poorly lit areas, critical for accident documentation and nighttime driving safety.