
JLabs Jbuds Mini Manual: A Comprehensive Guide (Updated 03/09/2026)
This manual provides detailed instructions for the Jbuds Mini, focusing on its remarkably reduced size and weight, offering a balance of value and performance.
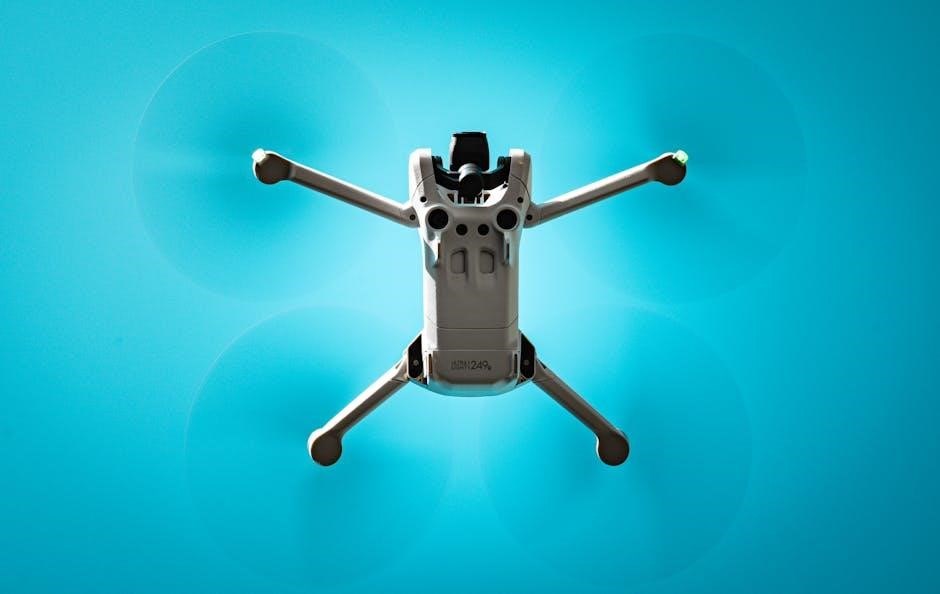
Welcome to the world of truly compact audio! The Jbuds Mini represent a significant leap forward in earbud technology, engineered by JLab to deliver exceptional sound in an unbelievably small form factor. These earbuds aren’t just about portability; they’re about experiencing audio freedom without compromise.
JLab recognized a need for earbuds that could keep pace with an active lifestyle, and the Jbuds Mini are the answer. They strike a solid balance between affordability and performance, making premium audio accessible to everyone. Announced recently, these earbuds drastically reduce size and weight compared to previous models, ensuring a comfortable and secure fit for hours of listening pleasure.
This manual will guide you through every aspect of your Jbuds Mini, from initial setup to advanced features, ensuring you get the most out of your new audio companion.
What’s in the Box?
Let’s verify you have everything needed to begin your audio journey with the Jbuds Mini! Carefully unpack the box and ensure the following components are present. You should find one (1) pair of Jbuds Mini earbuds – the stars of the show, meticulously engineered for compact size and impressive sound.
Additionally, the box contains a charging case, designed to provide multiple charges on the go, extending your listening time. Three (3) sets of ear tips in varying sizes (Small, Medium, Large) are included to guarantee a personalized and secure fit for optimal comfort and noise isolation. A USB-C charging cable is also provided for convenient power-up of the charging case.
Finally, you’ll receive this comprehensive user manual, offering detailed instructions and troubleshooting tips.
Key Features & Specifications
The Jbuds Mini redefine portability without sacrificing audio quality. A standout feature is their dramatically reduced size and weight, making them incredibly comfortable for extended wear. They boast Bluetooth 5.3 connectivity, ensuring a stable and efficient wireless connection with your devices.
Expect up to 15 hours of playtime with the charging case, and approximately 3 hours from a single earbud charge. The Jbuds Mini incorporate crystal-clear call quality thanks to built-in microphones. They are designed to strike a solid balance between value and performance.
Specifications: Bluetooth Version: 5.3, Playtime: Up to 15 hours (with case), Driver Size: 6mm, Charging Time: 1.5 hours (case), IP Rating: Not specified.

Setting Up Your Jbuds Mini
Begin by fully charging your Jbuds Mini for optimal performance and a longer listening experience. Pairing is simple, allowing quick connection to your devices.
Initial Charging Procedure
Before first use, it is crucial to fully charge your Jbuds Mini to ensure optimal battery performance and longevity. Locate the charging port, typically a USB-C port on the earbuds’ case.
Using the provided USB-C cable, connect the charging case to a powered USB port. The LED indicator on the case will illuminate, signaling the charging process.
A solid red light generally indicates charging is in progress. Once fully charged, the LED will typically turn to a solid blue or green color.
Allow approximately 1.5 to 2 hours for a complete charge. Avoid using fast chargers, as they may potentially damage the battery. Disconnect the charging cable once the charging is complete to prevent overcharging.
Bluetooth Pairing Instructions
To pair your Jbuds Mini with a device, first ensure the earbuds are powered off. Then, open the charging case near your smartphone or Bluetooth-enabled device.
The Jbuds Mini will automatically enter pairing mode upon opening the case, indicated by a flashing LED. Navigate to your device’s Bluetooth settings and search for available devices.
Locate “JLab Jbuds Mini” in the list and select it to initiate pairing. You may be prompted for a pairing code; if so, enter “0000” or confirm the connection.
Once successfully paired, the LED will typically turn solid blue. Your Jbuds Mini are now ready for use! To connect to a different device, repeat these steps.
Understanding the LED Indicator
The LED indicator on your Jbuds Mini provides crucial information about the earbuds’ status. A flashing blue light signifies pairing mode, actively searching for a Bluetooth connection.
A solid blue light indicates a successful Bluetooth connection. Flashing red generally means the battery is low and requires charging.
A solid red light during charging shows the earbuds are actively receiving power. Once fully charged, the LED will typically turn off or display a solid green light (if applicable).
A pulsing white light may indicate a reset is in progress or a specific error condition. Refer to the troubleshooting section for further details if you encounter unusual LED behavior.

Using Your Jbuds Mini
Explore the full functionality of your compact Jbuds Mini, from simple operation to seamless control of music and calls with intuitive ease.
Powering On/Off
To power on your Jbuds Mini, simply remove them from the charging case. They will automatically enter pairing mode if not previously connected. A brief audio cue will confirm power-on status. If automatic pairing fails, consult the Bluetooth Pairing Instructions section for manual connection steps.
To power off the earbuds, place them back into the charging case. They will automatically power down and begin charging. Alternatively, some models may support a touch control for manual power off – refer to the specific model’s quick start guide for details. Ensure the earbuds are fully seated within the case to guarantee proper power off and charging initiation. A solid light indicates charging, while no light signifies a full charge or power-off state.
Volume Control
Adjusting the volume on your Jbuds Mini is typically achieved through touch controls located on either earbud. A single tap on the right earbud usually increases the volume, while a single tap on the left earbud decreases it. The number of taps or hold duration may vary depending on the specific model; consult the quick start guide for precise instructions.
Volume levels are also influenced by the audio source device (phone, tablet, etc.). Ensure the source device’s volume is at a reasonable level before adjusting via the earbuds. Be mindful of listening at excessively high volumes for extended periods, as this can damage your hearing. Gradual adjustments are recommended for optimal listening comfort and safety.
Track Control (Play/Pause, Skip)
Managing your music playback with the Jbuds Mini is intuitive using touch controls. Typically, a double-tap on the right earbud will advance to the next track, while a double-tap on the left earbud will return to the previous track. A single press on either earbud usually functions as a play/pause control, conveniently stopping and resuming your audio.
These controls are designed for quick and easy access during activities. However, functionality can sometimes be customized through a companion app (if available). Refer to the quick start guide for specific gesture configurations. Consistent, deliberate taps are key for reliable track control operation.
Answering & Ending Calls
The Jbuds Mini allows for hands-free call management. To answer an incoming call, simply tap once on the right earbud. To reject a call, press and hold the right earbud for approximately two seconds. During a call, tap once on either earbud to end the conversation.
Call quality relies on a stable Bluetooth connection and proximity to your device. The built-in microphone aims to provide clear voice transmission. If experiencing issues, ensure the microphone isn’t obstructed. Some models may support voice assistant integration for call initiation – check your quick start guide!
Activating Voice Assistant (Siri, Google Assistant)
The Jbuds Mini offers seamless voice assistant access. To activate Siri or Google Assistant, press and hold the left earbud for approximately one second. This will launch your device’s default voice assistant.

Ensure your smartphone is paired and configured to recognize voice commands. Once activated, you can issue commands like making calls, sending messages, playing music, or getting information. Compatibility may vary depending on your device and operating system. Refer to your smartphone’s manual for specific voice assistant setup instructions. Enjoy hands-free control!

Comfort & Fit
Achieving optimal comfort and a secure fit is crucial with the Jbuds Mini. Explore various ear tip sizes to personalize your listening experience.
Ear Tip Selection & Sizing
The Jbuds Mini includes multiple ear tip sizes – Small, Medium, and Large – to ensure a comfortable and secure fit for a wide range of ear canals. Experimenting with different sizes is essential for optimal sound quality and noise isolation.
To determine the correct size, gently insert an ear tip into your ear canal. You should feel a snug, yet comfortable, seal. If the ear tip feels loose or doesn’t create a seal, try a larger size. Conversely, if it causes discomfort or pressure, select a smaller size.
Properly fitted ear tips not only enhance audio performance but also improve the stability of the earbuds during activities like running or exercising. Take the time to find the perfect fit for your ears!
Ensuring a Secure Fit
Achieving a secure fit with your Jbuds Mini is crucial for both comfort and optimal performance. Once you’ve selected the appropriate ear tip size, gently insert the earbud into your ear canal, angling it slightly forward for a better seal.
A secure fit prevents the earbuds from falling out during movement and maximizes noise isolation, allowing you to fully immerse yourself in your audio. Gently tug on the earbuds after insertion to confirm they are firmly in place.
If you experience slippage, try a different ear tip size or adjust the angle of insertion. A well-fitted earbud should feel secure without causing discomfort or pressure.
Wearing Styles for Different Activities
The Jbuds Mini’s compact design allows for versatile wearing styles, adapting to various activities. For everyday use and casual listening, a standard insertion is recommended – comfortably securing the earbuds within your ear canal.
During workouts or more vigorous movement, consider utilizing the included ear hooks (if provided) for an extra layer of security. These hooks wrap around the outer ear, preventing slippage.
For less intense activities like walking, a shallower insertion might be preferred for increased awareness of your surroundings. Experiment to find the most comfortable and secure fit for each situation, prioritizing both audio quality and safety.

Troubleshooting Common Issues
This section addresses frequent problems with the Jbuds Mini, including sound, Bluetooth connectivity, charging, and microphone malfunctions, offering quick solutions.
No Sound Output
Experiencing silence with your Jbuds Mini? Several factors could be at play. First, ensure the earbuds are fully charged and properly connected via Bluetooth to your audio source. Verify the volume level on both your device and the earbuds themselves – it’s surprisingly common for one to be muted!
Next, try disconnecting and reconnecting the Bluetooth connection. If the issue persists, test with a different audio source (phone, tablet, computer) to isolate whether the problem lies with the earbuds or the original device. Check your device’s audio output settings to confirm the Jbuds Mini are selected as the active playback device.
Finally, a quick reset of the earbuds can often resolve software glitches. Refer to the ‘Resetting to Factory Defaults’ section for instructions. If none of these steps restore sound, contact JLab customer support for further assistance.
Bluetooth Connection Problems
Difficulty pairing or maintaining a stable Bluetooth connection? Begin by ensuring your Jbuds Mini are in pairing mode – typically indicated by a flashing LED. Confirm Bluetooth is enabled on your device and that the earbuds are within range (generally within 33 feet/10 meters). Remove any previous pairings of the Jbuds Mini from your device’s Bluetooth settings, then attempt to pair again.
Interference from other wireless devices can sometimes disrupt the connection. Try moving away from potential sources of interference, such as microwaves or other Bluetooth devices. Restarting both your earbuds and your device can often resolve temporary glitches.
If pairing repeatedly fails, a factory reset (see ‘Resetting to Factory Defaults’) might be necessary. Contact JLab support if problems continue.
Charging Issues
Experiencing problems charging your Jbuds Mini? First, verify the charging cable is securely connected to both the earbuds and a powered USB port. Ensure the USB port is functioning correctly by testing with another device. A slow charge could indicate a faulty cable; try a different one.
The LED indicator will display the charging status – refer to ‘Understanding the LED Indicator’ for details. If the earbuds aren’t charging at all, clean the charging contacts on both the earbuds and the charging case with a dry, soft cloth.
Avoid using fast chargers as they may damage the battery. If issues persist, a factory reset might help. Contact JLab support for further assistance.
Microphone Not Working
If you’re having trouble with the microphone during calls or voice assistant use, first ensure nothing is blocking the microphone port on the earbuds. Check your device’s settings to confirm the Jbuds Mini are selected as the active microphone input.
Try restarting both your Jbuds Mini and your connected device. Interference from other Bluetooth devices can sometimes cause issues; move away from potential sources of interference. Ensure the earbuds are within a reasonable range of your device – typically within 33 feet.
A factory reset may resolve software glitches. If the problem continues, contact JLab customer support for further troubleshooting.

Maintenance & Care
Regular cleaning and proper storage will extend the life of your Jbuds Mini. Pay attention to the IP rating for water resistance guidelines.
Cleaning Your Jbuds Mini
To ensure optimal performance and longevity, regularly clean your Jbuds Mini. Begin by gently wiping the earbuds with a soft, dry cloth to remove any dust or debris. For more stubborn grime, lightly dampen the cloth with distilled water – avoid using harsh chemicals or solvents as these can damage the components.
Pay close attention to the ear tips, as these accumulate earwax and oils. Remove the ear tips and wash them separately with mild soap and water. Ensure they are completely dry before reattaching them to the earbuds. The charging contacts should also be cleaned periodically with a dry cotton swab to maintain a reliable charging connection. Never submerge the earbuds or charging case in water.
Regular cleaning prevents build-up that can affect sound quality and hygiene, keeping your Jbuds Mini in top condition for extended use.
Storage Recommendations
Proper storage is crucial for maintaining the lifespan and functionality of your Jbuds Mini. When not in use, always store the earbuds in their charging case. The case provides protection against dust, moisture, and accidental damage. Avoid exposing the case – or the earbuds themselves – to extreme temperatures, such as direct sunlight or freezing conditions.
Keep the charging case in a dry location, away from potential spills or humidity. Do not store the earbuds with sharp objects that could scratch or puncture the casing. If you won’t be using the Jbuds Mini for an extended period, it’s recommended to charge the case to around 50% before storing it.
This prevents the battery from completely discharging, which can potentially shorten its overall lifespan. Following these simple storage guidelines will help ensure your Jbuds Mini remain in excellent condition.
Water Resistance Information (IP Rating)
The Jbuds Mini are designed to withstand light exposure to moisture, but are not fully waterproof. Understanding the IP rating is key to protecting your earbuds. While specific IP ratings may vary between Jbuds Mini models, generally they offer an IPX4 level of protection.
IPX4 signifies resistance to splashes of water from any direction. This means they can handle sweat during workouts or light rain. However, they should not be submerged in water, exposed to heavy downpours, or used while swimming.
Avoid wearing the earbuds in the shower or during activities where they may be directly exposed to significant amounts of water. Damage caused by water exposure is not covered under the warranty. Always ensure the earbuds and charging case are dry before charging;

Advanced Features & Settings
Explore customization options, including potential EQ settings and firmware updates (if available), to enhance your Jbuds Mini experience and optimize audio performance.
EQ Settings & Customization (if applicable)
The Jbuds Mini may offer customizable EQ (Equalization) settings through the JLab Audio app, available for both iOS and Android devices. These settings allow you to tailor the sound profile to your personal preferences. Within the app, you might find pre-set EQ modes like ‘Bass Boost’, ‘Balanced’, or ‘Vocal’, designed for different music genres and listening scenarios.
For more granular control, a custom EQ mode could be available, enabling you to adjust specific frequency bands. Experimenting with these bands – typically representing lows, mids, and highs – can significantly alter the soundstage. Increasing the bass frequencies will enhance low-end impact, while boosting the highs can improve clarity. Remember to make small adjustments and listen carefully to the changes.
If EQ customization isn’t directly supported, explore third-party EQ apps compatible with your smartphone’s Bluetooth audio output.
Firmware Updates (if applicable)
Periodically, JLab Audio releases firmware updates for the Jbuds Mini to improve performance, enhance features, and address potential bugs. These updates are typically delivered through the JLab Audio app, available on iOS and Android. To check for updates, connect your Jbuds Mini to your smartphone via Bluetooth and open the app.
The app will automatically scan for available updates and prompt you to begin the installation process. It’s crucial to ensure your earbuds have sufficient battery life – ideally above 50% – before initiating a firmware update. Interrupting the update process could potentially damage the device.
Follow the on-screen instructions carefully during the update. The process may take several minutes, and your earbuds will be temporarily unavailable during this time. Regularly checking for updates ensures you’re experiencing the best possible performance from your Jbuds Mini.
Resetting to Factory Defaults
If you encounter persistent issues with your Jbuds Mini, such as connectivity problems or unexpected behavior, resetting them to factory defaults can often resolve these concerns. This process erases all saved settings and restores the earbuds to their original state.
To initiate a factory reset, first ensure your Jbuds Mini are powered off. Then, press and hold the button on each earbud for a specific duration – typically 10-15 seconds – until the LED indicator flashes a particular color, indicating the reset is in progress.
Once the reset is complete, the earbuds will be ready for pairing again. You’ll need to re-establish the Bluetooth connection with your device. Remember that this will delete all custom EQ settings and paired device history.

Safety Information & Warranty
Prioritize safe usage and familiarize yourself with the warranty details to ensure optimal performance and protection for your new Jbuds Mini earbuds.
Important Safety Precautions
To prevent damage to your hearing, avoid prolonged listening at high volumes. Adjust the volume to a safe and comfortable level before use. Do not use the Jbuds Mini while operating a vehicle or machinery, as this could create a safety hazard;
Keep the earbuds dry and avoid exposing them to extreme temperatures. Do not disassemble or attempt to repair the Jbuds Mini yourself, as this will void the warranty.
Small parts may present a choking hazard; keep out of reach of young children and pets. If you experience discomfort or irritation while using the earbuds, discontinue use immediately. Regularly clean the earbuds to maintain hygiene and prevent ear infections. Dispose of the product responsibly according to local regulations.
Warranty Details & Registration
JLab Audio warrants these earbuds for one year from the date of purchase against defects in materials and workmanship. This warranty covers normal use and does not include damage from misuse, accidents, or unauthorized modifications.
To register your Jbuds Mini and activate your warranty, please visit our website at [insert website address here]; Registration allows us to provide faster support and keep you updated on firmware updates and promotions.
For warranty claims, contact our customer support team through the website. Proof of purchase is required. This warranty gives you specific legal rights, and you may have other rights that vary by location.